I have been thinking about writing this article FOREVER and finally had a chance to test out a few recipes on a recent trip to Lava Beds National Monument. I am a relatively seasoned camp cook but baking over a fire has always seemed like a daunting task. How silly of me, it’s so easy!
I wanted to find something that was multi-useful. In other words, the base ingredients would be flexible enough to use the recipe for multiple dishes
First off, in searching for a recipe I wanted to find something that was multi-useful. In other words, the base ingredients would be flexible enough to use the recipe for multiple dishes. In baking, as long as you get your basic ratios straight (flour to fat to leavening ingredient) you can season it for sweet or savory. I also used this basic recipe (minus the butter) for campfire chicken and biscuits so look for another article soon.
Secondly, I wanted a recipe that could be partially put together before hand at home so it was easy to prepare when outdoors with potentially limited counter space. For this recipe, I combined the dry ingredients at home, threw it in my pantry bag or cooler, once camp was set up, I kneaded in the butter and added the buttermilk…voilà, instant biscuits!
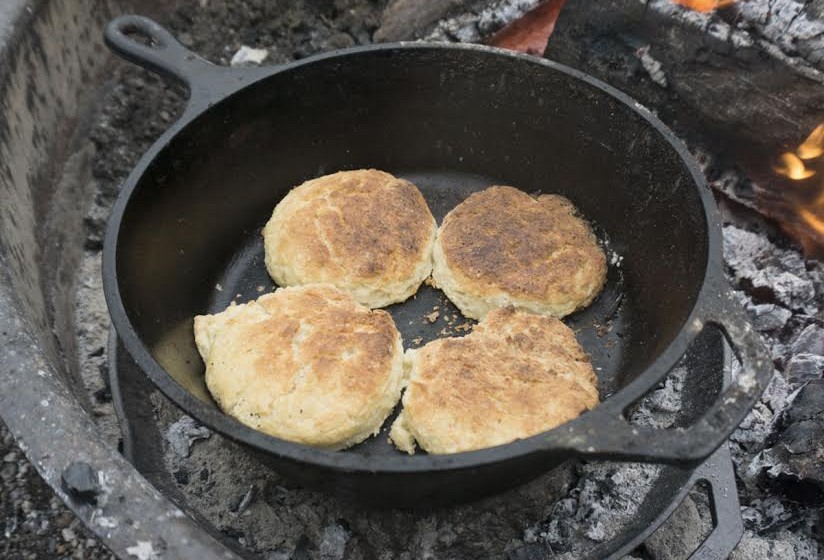
A few words on the method of baking over a campfire: essentially what you want to do is to create radiant heat that evenly cooks the food. My first few attempts at this resulted in overcooking on one side of the pan and undercooking on the other. I think this is a pretty common rookie mistake and I was happy to get advice from my dad on how to fix the issue. He recommended using a second larger cast iron skillet filled with rocks set atop the hottest coals to create a base that will help distribute the heat more evenly as well as creating a buffer zone to prevent the bottom of the biscuits from burning…brilliant!
Cooking Method:
1. After getting my coals gray hot (I found a combination of charcoal and firewood provided the perfect amount of heat needed for this project) and half-buried the large skillet.
2. Next, I filled the large skillet with 1-2 inch sized rocks.
3. Then, I placed the Dutch oven atop this and added the biscuits to the pan.
4. Put the lid on and cover with a few pieces of charcoal and a few of the smaller pieces of wood coals. Leave for 15 minutes before you take a peek at the progress (timing is not an exact science when using fire). Carefully remove the lid to see if the tops of the biscuits are golden. You don’t want to wait until they are completely browned to remove them from the coals as the remaining radiant heat of the Dutch oven will continue baking them for several minutes after.
5. I found using silicone oven mitts to remove the oven from the fire worked brilliantly.
Campfire Biscuits Recipe
Ingredients:
2 cups all-purpose flour
1 tsp. salt
1 tsp. sugar (1 Tb. If you want slightly sweeter)
2 tsp. baking powder
1 stick cold butter, chopped into small pieces
3/4 to 1 cup of buttermilk (add just enough liquid so the dough holds together without being too tacky)
Preparation:
1. Before your trip, combine flour, salt, sugar and baking powder. Mix well and store in a leak proof container.
2. Make sure your butter is cold.
3. Combine dry ingredients with butter bits and rub butter into flour mixture with your fingertips until the butter pieces are the size of peas.
4. Put ¾ cup buttermilk into dry/butter mixture and gently mix just until it comes together…don’t over mix or you will have tough biscuits, yuck!
5. Put dough onto a floured board and press gently with your fingertips until the dough is about ¾ inch thick.
6. Use a biscuit cutter something that is round to cut the biscuits. Alternatively you can simply cut them with a knife if you don’t mind square biscuits.
7. Place in pan, pressing biscuits against each other. I found this recipe worked well to fill the bottom of a 12-inch Dutch oven with about 10 biscuits.
8. Place lid on top, cover with coals and let it bake for at least 15 minutes before you check it. If the biscuits are still pale, cover and check every 5 minutes until the tops are golden but not browned.
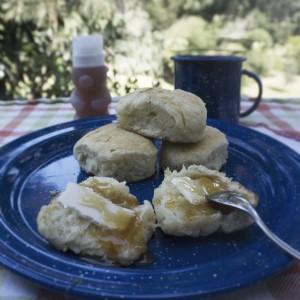
9. Serve with gobs of butter and honey or jam and pig out!!
In the next Dutch oven article will tell you how to use this recipe to make Chicken & Dumplings!! XO and Get Outside!


Yum